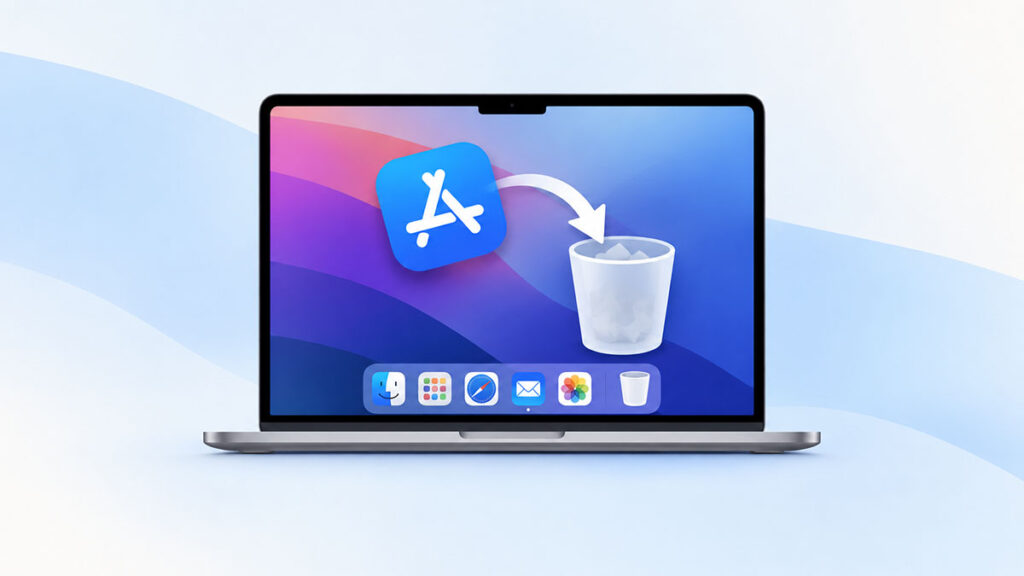
If you’ve recently switched from Windows to macOS, uninstalling an app may seem surprisingly simple. Just drag the app to the Trash, empty it, and you’re done. Right?
Not always.
Moving an app to the Trash removes the main application, but macOS can leave behind related files such as preferences, caches, saved data, logs, and other support files. These files are usually small, but they can add up over time, especially if you install and remove a lot of apps.
There’s also another catch. Some apps, particularly larger software suites and utilities, come with their own uninstallers. Using the right method can help you remove the app more cleanly and avoid leaving unnecessary files behind.
Whether you want to free up storage, remove an app you no longer use, troubleshoot a problematic application, or completely clean up a program, this guide will show you how to uninstall apps on Mac step by step.
We’ll cover four practical methods:
Not sure which method to use? The quick-reference table below can help you choose.
Quick Decision Matrix: Which Method Should You Use?
| Where did you get the app? | Recommended Method | Time Required | Removes Leftover Files? |
|---|---|---|---|
| Mac App Store | Launchpad | < 1 minute | Partially |
| Web Download (.dmg / .zip) | Finder + Move to Trash | ~1 minute | Partially |
| Apps with a Native Uninstaller | App’s own Uninstaller | 2–3 minutes | Usually |
| Complete Removal | Manual ~/Library Cleanup or AppCleaner | 2–4 minutes | More Thoroughly |
You can jump to the method that matches your situation, or follow the guide from the beginning for a complete walkthrough.
Method 1: Uninstall Apps via Launchpad (Best for App Store Apps)
If you downloaded an app from the Mac App Store, Launchpad is one of the quickest ways to remove it. The process is similar to deleting an app on an iPhone or iPad, and you don’t need to dig through your Mac’s folders.
Why doesn’t an app show an “X” button in Launchpad?
If you don’t see an X button, the app may not have been installed through the Mac App Store. Apps installed from a website using a .dmg or .pkg file usually need to be removed through Finder instead.
Some built-in macOS apps are also protected and can’t be uninstalled normally. If Launchpad doesn’t give you the option to delete an app, move on to Method 2.
Method 2: Uninstall via Finder & Trash (The Standard Way)
For apps downloaded from the web, such as Chrome, Slack, Discord, or Zoom, Finder is the standard way to uninstall them. You simply remove the app from the Applications folder and empty the Trash.
Keep in mind, though, that this removes the main application but may leave behind related files such as preferences, caches, and support data. We’ll deal with those leftovers in Method 3.
Troubleshooting: “The item can’t be moved to the Trash because it’s open”
This is a common problem when uninstalling apps on Mac. Usually, the app or one of its background processes is still running.
Try these steps:
Once the app has completely closed, try moving it to the Trash again.
Still seeing the same message? Restarting your Mac can also stop any background process that is preventing the app from being removed.
Method 3: Completely Remove Leftover Files (The Deep Clean)
Moving an app to the Trash removes the main .app bundle, but some apps leave related files behind. These can include preferences, caches, saved application data, logs, and other support files.
If you want to clean up an app more thoroughly, you can manually look for these leftovers inside your personal ~/Library folder.
This method is especially useful when you are troubleshooting an app, preparing to reinstall it, or simply want to remove its associated files.
Safety Warning
The ~/Library folder contains important data used by your apps and macOS. Don’t delete files just because you don’t recognize them.
Only remove files or folders that clearly belong to the app you have already uninstalled. Look for the app name, the developer/company name, or a clearly matching identifier such as com.spotify.*.
If you’re unsure about a file, leave it alone.
| Folder | What It May Contain | What to Look For |
|---|---|---|
~/Library/Application Support/ | App databases, profiles, and other support data | Folders matching the app or developer name |
~/Library/Caches/ | Temporary cache files | Folders associated with the app |
~/Library/Preferences/ | App settings and preferences | Matching .plist files, such as com.spotify.client.plist |
~/Library/Logs/ | App logs and diagnostic information | Folders or files associated with the app |
~/Library/Saved Application State/ | Saved app window and session information | Folders associated with the app |
Pro Tip: Find Leftover Files Faster with Finder
Checking several Library folders manually can be a little tedious, especially if you have many apps installed. Finder’s search feature can make the process faster.
This approach can help you spot leftover files without manually opening every Library folder.
Method 4: Use a Dedicated App Cleaner or Native Uninstaller
Manually searching through ~/Library works, but it can be tedious. You also need to be careful not to remove files that belong to another app.
If you want a simpler way to find associated files, a dedicated Mac app cleaner can do much of the searching for you. For larger software suites, however, the developer’s own uninstaller is usually the better option.
Option A: AppCleaner
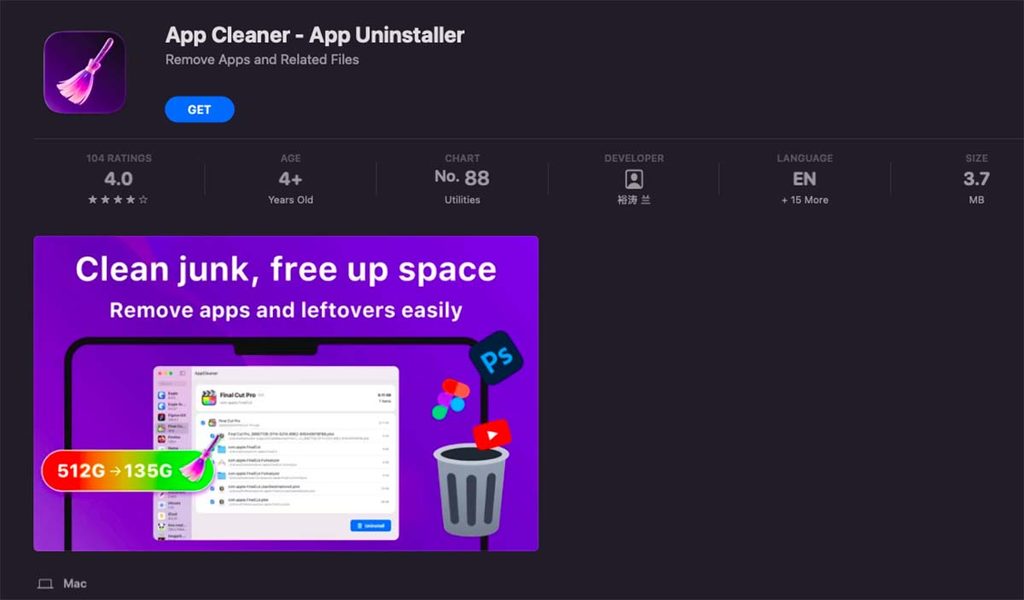
AppCleaner by FreeMacSoft is a lightweight utility designed to find files associated with an app and remove them together. It can be useful when you want a more thorough cleanup without manually searching through multiple Library folders.
What about SmartDelete?
AppCleaner also offers a SmartDelete feature that can detect related files when you move an app to the Trash. If you enable it, you’ll be prompted to review the associated files before they are removed.
Option B: Use the App’s Native Uninstaller
Some larger applications come with their own uninstallers. This is common with software suites and utilities that install additional components outside the main .app file.
Examples include software from Adobe, Microsoft, virtualization tools, security software, and other specialized utilities.
If an app provides an official uninstaller, it’s generally a good idea to use it rather than simply dragging the app to the Trash.
Here are a few places to look:
For example, Adobe applications can be removed through the Adobe Creative Cloud desktop app, which provides an uninstall option for installed Adobe software.
Bottom line: If the developer provides a dedicated uninstaller, use it first. It may know about additional components that a simple drag-and-drop removal won’t detect.
Bonus Method: Uninstall Apps Using Terminal (For Power Users)
If an app refuses to move to the Trash or Finder isn’t cooperating, you can use Terminal to remove the application’s .app bundle directly.
This method is intended for advanced Mac users. Unlike moving an app to the Trash, a Terminal removal command can delete the selected file immediately and permanently.
Caution: The rm -rf command is powerful and does not move files to the Trash. A typo in the app name or path could result in deleting the wrong file. If you aren’t comfortable using Terminal, stick with Finder or one of the methods above.
Important: Terminal Doesn’t Remove Everything
This command removes the application bundle, but it doesn’t automatically remove related files stored in your user Library.
If you want to clean up those files as well, you’ll still need to check the relevant ~/Library folders covered in Method 3 or use a dedicated app cleaner.
For most users, Terminal should be considered a last-resort method, not the standard way to uninstall Mac apps.
Troubleshooting: Common Mac App Uninstall Issues
Most Mac apps uninstall without much trouble, but macOS can occasionally get in the way. If you see an error message or an app refuses to disappear, try the fixes below.
1. “The item can’t be moved to the Trash because it’s open”
This usually means the app, or one of its background processes, is still running.
First, try quitting the app normally. If that doesn’t work:
Some apps also continue running from the menu bar, so check there and quit the app before trying again.
2. Can’t Delete Built-In Apple Apps
Some apps that come with macOS, such as Safari, Mail, and FaceTime, can’t be removed using the normal uninstall methods.
This is partly because macOS protects important system components using security features such as System Integrity Protection (SIP) and the sealed system volume.
You may find guides online that recommend disabling SIP to remove protected apps. We don’t recommend doing that just to uninstall a built-in Mac app. It can weaken important system protections and isn’t necessary for normal Mac use.
If you don’t use a built-in app, the simplest option is to remove it from your Dock or otherwise leave it unused.
3. A Deleted App Still Appears in Launchpad
Occasionally, Launchpad may continue showing an app icon after the application itself has been removed.
If the icon is blank, unresponsive, or clearly points to an app you’ve already uninstalled, restarting your Mac may be enough to refresh Launchpad.
If the problem persists, you can reset the Launchpad layout from Terminal:
defaults write com.apple.dock ResetLaunchPad -bool true; killall DockThe Dock will restart, and Launchpad will rebuild its app layout.
Note: This command can also reset the arrangement of your Launchpad icons, so use it only if you’re comfortable with that change.
4. An App Keeps Coming Back After Restart
If an app appears again after you’ve removed it, don’t assume that macOS itself is reinstalling it.
Check whether the app has a login item or background component that is still active:
If the app was installed or managed by another piece of software, such as a security tool, device-management system, or software suite, check that software as well. It may be responsible for reinstalling or restoring the application.
If the problem continues, restarting your Mac and checking the app developer’s own uninstall instructions are good next steps.
Frequently Asked Questions (FAQ)
Does dragging an app to the Trash delete everything?
No. Moving an app to the Trash removes the main .app bundle, but some related files may remain in your user Library.
These can include preferences, caches, saved application states, logs, and other support files. If you want to remove those files as well, you can clean them up manually from ~/Library or use a dedicated app cleaner such as AppCleaner.
Will uninstalling an app cancel my active subscription?
No. Removing an app from your Mac does not automatically cancel a subscription or recurring payment.
If you subscribed through Apple, open System Settings → [Your Name] → Subscriptions and cancel the subscription there.
If you subscribed directly through the developer’s website, you’ll usually need to sign in to your account through a browser and manage the subscription from there.
Can I reinstall an app I previously deleted from the Mac App Store?
Yes, in most cases.
Apps you’ve previously downloaded or purchased from the Mac App Store are associated with your Apple Account. To reinstall one, open the App Store, select your account from the sidebar, find the app in your purchase history, and click the download button.
However, an app may not be available to reinstall if the developer has removed it from the App Store, it is no longer compatible with your Mac, or there is another account or availability issue.
Why won’t macOS let me empty the Trash after deleting an app?
If macOS says an item in the Trash is in use or locked, first make sure the related app isn’t still running.
You can try quitting the app, using Force Quit if necessary, and then emptying the Trash again. If the problem persists, restart your Mac and try once more.
If a specific file remains stuck in the Trash, avoid using Terminal commands to force-delete it unless you understand exactly what you’re removing.
Is it safe to delete files inside ~/Library?
It can be safe if you know exactly what the files belong to.
The ~/Library folder contains data used by your apps and user account, so you shouldn’t delete files simply because they look unfamiliar. Only remove files or folders that clearly belong to an app you’ve already uninstalled.
It’s also important to distinguish your personal Library (~/Library) from system locations such as /System/Library and /Library. Don’t delete system files or folders unless you know exactly what they are and why they can be removed.
Conclusion
Uninstalling an app on a Mac is usually pretty simple. For apps downloaded from the Mac App Store, Launchpad provides a quick way to remove them. For apps downloaded from the web, Finder → Applications → Move to Trash is the standard approach.
But if you’re trying to completely clean up an application, there’s one extra step worth knowing about. Checking the app’s related files in ~/Library can help remove leftover preferences, caches, logs, and support data.
For a simpler cleanup, you can use a dedicated tool such as AppCleaner. And if you’re removing a large software suite that provides its own uninstaller, it’s generally best to use the developer’s official removal tool.
So, the right method depends on how the app was installed and how thoroughly you want to remove it.
If you’ve run into a stubborn Mac app that refuses to uninstall, the troubleshooting steps above should help you track down the problem without making risky changes to macOS.