Snapping a screenshot shouldn’t feel like a mini project. Yet somehow, when you’re rushing to capture that error message, a quick tutorial, or even a funny meme, it always seems harder than it should be. That’s where keyboard shortcuts come in. One quick combo of keys, and boom—you’ve got exactly what you need.
Shortcuts aren’t just for techies either. Students, remote workers, gamers, even casual users—everyone saves time by knowing the right keys. No need to dig through menus or fumble with extra clicks.
In this post, we’ll walk through the keyboard shortcuts for snipping tools on:
We’ll also throw in some quick tips, third-party tools worth trying, and fixes if your shortcuts act up. The idea is simple: after reading this, you’ll know exactly which keys to hit—on any device—without breaking your flow.
Windows Snipping Tool Shortcuts
If you’re on Windows 10 or 11, your main screenshot buddy is the Snipping Tool (previously known as Snip & Sketch). It’s built-in, free, and surprisingly powerful once you know the right shortcuts.
Default Shortcuts You’ll Actually Use
| Action | Shortcut | Notes |
|---|---|---|
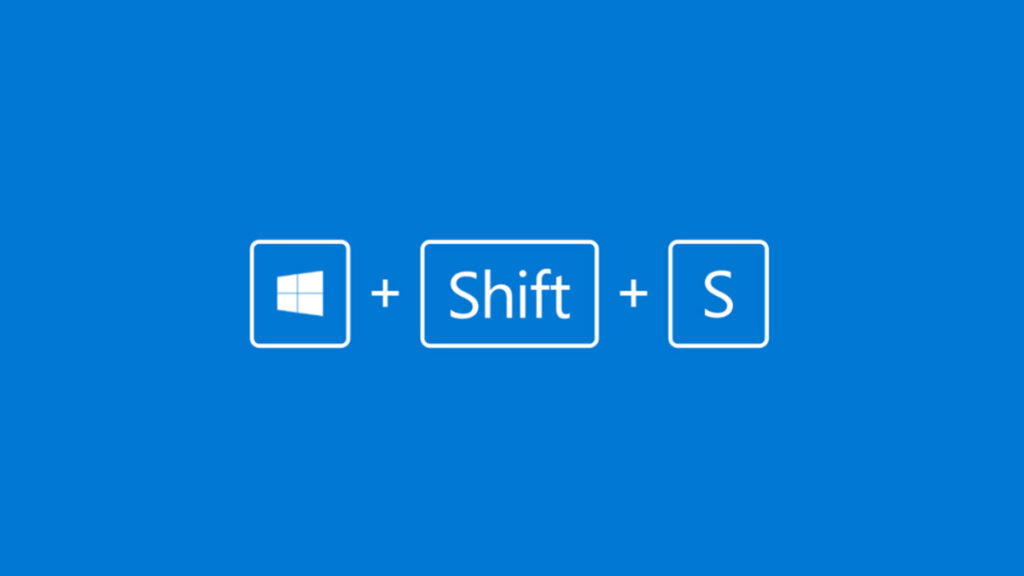
| Open snipping overlay | Win + Shift + S | Pick rectangle, freeform, window, or full screen |
| Full screen to clipboard | PrtSc | Default behavior; can be re-mapped to open Snipping Tool |
| Choose snip mode (inside app) | Alt + M | Cycles through snip types |
| Repeat last snip mode | Alt + N | Starts a new snip using the last setting |
| Copy selected snip | Ctrl + C | Handy for pasting into chat or docs |
Customizing Your Shortcuts
Want Print Screen to launch Snipping Tool directly? Here’s how:
- Press Win + I to open Settings.
- Go to Accessibility → Keyboard.
- Flip on Use the Print Screen key to open screen snipping.
From then on, a single tap of PrtSc brings up the snipping overlay. (Handy if you don’t want to juggle three keys every time.)
For advanced users: there are registry tweaks that let you re-map or create custom shortcuts. Not necessary for most people, but it’s an option if you’re picky about hotkeys.
Tips for Everyday Use
Third-Party Alternatives
If you take a lot of screenshots and need more options, try these popular tools:
| Tool | Shortcut Example | Why Use It? |
|---|---|---|
| Greenshot | Ctrl + PrtSc → Region capture | Lightweight, simple, quick edits |
| ShareX | Fully customizable | Scrolling screenshots, GIFs, automation |
These aren’t necessary for most users, but if you’re serious about screenshots, they’re worth a look.
Mac Screenshot Shortcuts
Macs don’t technically have a “Snipping Tool,” but their built-in screenshot shortcuts are just as powerful—arguably even smoother. With a few simple key combos, you can grab part of the screen, the whole thing, or even record video without needing extra apps.
Default Shortcuts
Here’s the core set you’ll use the most:
| Action | Shortcut | Notes |
|---|---|---|
| Full screen | Command + Shift + 3 | Saves to Desktop by default |
| Select area | Command + Shift + 4 | Drag to capture; add Spacebar to grab a specific window |
| Screenshot toolbar | Command + Shift + 5 | Opens a panel with capture & recording options (macOS Mojave+) |
| Touch Bar (on MacBooks with Touch Bar) | Command + Shift + 6 | Captures just the Touch Bar |
Handy Modifiers
Want more control? Add these while using the shortcuts above:
| Modifier | Effect | Example |
|---|---|---|
| Control | Sends screenshot to clipboard instead of saving | Control + Command + Shift + 3 |
| Option | Adjusts selection area symmetrically | Option + Command + Shift + 4 |
Customization
Tips for Everyday Use
Third-Party Tools (Optional)
While macOS covers most needs, some users prefer extra features:
| Tool | Shortcut Example | Why Use It? |
|---|---|---|
| Snagit | Customizable (e.g., Shift + F11 for region capture) | Advanced editing, scrolling captures, tutorials |
| Lightshot | Customizable hotkeys | Quick annotation & cloud sharing |
These aren’t necessary for everyday screenshots, but if you’re making tutorials or need scrolling captures, they’re worth trying.
Chromebook Screenshot Shortcuts
Chromebooks keep things simple—no separate snipping app, no confusing settings. Just a couple of shortcuts and you’re good to go. If you live in Google’s cloud ecosystem, this straightforward approach makes total sense.
Default Shortcuts
Here are the main key combos you’ll actually use:
| Action | Shortcut | Notes |
|---|---|---|
| Full screen | Ctrl + Show Windows (F5) | Captures the entire screen |
| Select area | Shift + Ctrl + Show Windows (F5) | Click and drag to capture part of the screen |
| Tablet/2-in-1 full screen | Power + Volume Down | Works like Android devices |
Accessing Screenshots
Tips for Everyday Use
Third-Party Tools (Optional)
If you want more than the basics, Chrome extensions can add extra punch:
| Tool | Shortcut Example | Why Use It? |
|---|---|---|
| Nimbus Screenshot | Customizable hotkeys | Capture full pages, record video, annotate |
| Awesome Screenshot | Customizable | Great for quick edits and sharing links |
Both extensions work inside Chrome and sync well with cloud workflows.
Comparison of Shortcuts Across Platforms
By now, you’ve seen how each device handles screenshots a little differently. Windows leans on its Snipping Tool/Snip & Sketch, Macs pack in a powerful Screenshot app, and Chromebooks keep it lightweight and cloud-friendly.
Here’s a quick side-by-side look:
| Platform | Full Screen | Partial Screen | Window Only | Extra Features | Save Location |
|---|---|---|---|---|---|
| Windows | PrtSc (clipboard) or Win + Shift + S(choose mode) | Win + Shift + S → drag to select | Alt + M(inside Snipping Tool) | Delay timer, annotation tools | Clipboard (default) or manual save |
| Mac | Command + Shift + 3 | Command + Shift + 4→ drag | Command + Shift + 4 + Spacebar | Screenshot app (Command + Shift + 5) for video, save options, floating thumbnail | Desktop by default (customizable) |
| Chromebook | Ctrl + Show Windows | Shift + Ctrl + Show Windows | N/A | Quick Settings → Screen Capture tool, built-in annotation | Downloads folder (auto-syncs with Drive if enabled) |
Key Differences at a Glance
If you jump between devices (say, Windows at work, Mac at home, and a Chromebook for travel), it can feel like juggling different spells. A neat trick is to install a lightweight third-party tool like Lightshot or Nimbus on each platform. That way, you can stick to the same shortcut style across devices.
Troubleshooting Common Issues
Even the best shortcuts can act up sometimes. Here are the most common snipping tool problems—and how to fix them.
Shortcuts not working at all
Windows:
Mac:
Chromebook:
Wrong file location or missing screenshots
Bottom Line
Screenshots are one of those everyday things we all use—but hardly think about. Once you get the right shortcuts under your fingers, though, it feels almost magical. No more menu-diving, no more wasted clicks. Just quick snips, ready to paste, edit, or share.
To recap:
- Windows users can lean on
Windows + Shift + S(or customize PrtSc). - Mac fans get plenty of flexibility with combos like
Command + Shift + 3/4/5. - Chromebook users keep it simple with
Ctrl + Show Windows.
And if you want more—annotation, cloud sync, screen recording—built-in tools and third-party apps have your back.
The best part? You don’t need to memorize every shortcut. Start with one or two that fit your daily workflow. Use them until they’re second nature. From there, you can layer on the fancy stuff.
So, here’s your challenge: try out a shortcut today. See how much smoother it feels. And if you’ve got a favorite trick or third-party tool, drop it in the comments—I’d love to hear what works for you.
Because at the end of the day, screenshots aren’t just about capturing your screen. They’re about saving time. And who doesn’t want a little more of that?
Additional Resources
If you want to go even deeper, here are some official guides and handy tools worth bookmarking:
Official Documentation
Popular Third-Party Tools
Bonus Idea
Want something visual? Try making a cheat sheet with your favorite shortcuts and keep it pinned near your desk. One quick glance, and you’ll never fumble a combo again.


